PPF Installation Tools: Everything You Need to Install Paint Protection Film
If you want to keep your car’s exterior in pristine condition for years to come, one of the smartest moves you can make is applying Paint Protection Film (PPF). Whether you’re driving a brand-new ride off the lot or giving a classic car some extra TLC, a high-quality scratch-resistant PPF film will protect your paint from chips, UV rays, road debris, and more. But to apply this invisible armor correctly, you need more than just the film itself—you need the right paint protection film installation tools. In this complete guide, we’ll walk you through the most essential tools for PPF installation, how to use them properly, and the steps to apply the film like a professional.
Why Use Paint Protection Film?
Before diving into tools and techniques, let’s quickly revisit why PPF is a must-have for car enthusiasts and professional detailers alike. We list 5 key advantages of PPF:
- Protect car paint from scratches with PPF
- Shields against UV rays, chemical stains, and environmental damage
- Offers self-healing technology that removes light scratches with heat
- Maintains the vehicle’s resale value
- Enhances appearance with options like matte or gloss finishes
Installing PPF to prevent rock chips and long-term damage saves time and money on future paint jobs. But even the best film won’t perform well if it’s applied incorrectly.
Must-Have Paint Protection Film Installation Tools
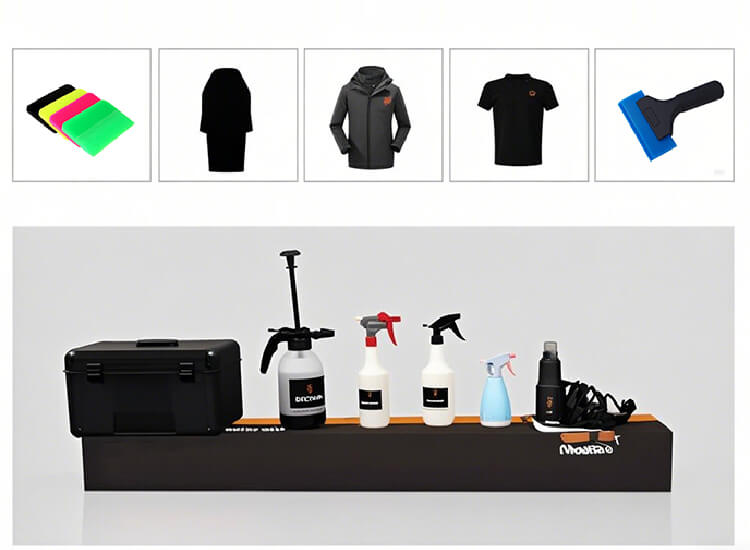
Let’s look at the PPF installer kit that will take your installation game to the next level. These are the same tools used by PPF professionals around the world.
1. Clay Bar for Paint Protection Film
A clay bar is critical for PPF surface preparation. Even after washing the car, small contaminants like brake dust, tar, and industrial fallout stay on the surface. Using a clay bar for PPF installation removes those micro-particles and gives you a glass-smooth surface to work with. Skipping this step can lead to imperfections under the film.
2. Slip Solution for PPF Installation
The slip solution is usually a mix of water and a few drops of baby shampoo or specialized PPF solution. It acts as a lubricant, allowing the film to float on the surface for accurate positioning. Spray a generous amount of slip solution for PPF before applying the film to avoid wrinkles, fingerprints, or misalignment.
3. Spray Bottle for PPF Application
Choose a spray bottle for PPF application that creates a fine, even mist. A poor-quality sprayer might release uneven amounts of solution or break easily. Look for pressure sprayers with adjustable nozzles that can handle both slip solutions and tack solutions (used for final adhesion).
4. Microfiber Towels for PPF Installation
You’ll need multiple high-absorbent microfiber towels to dry the surface and clean off any excess solution during installation. Go for lint-free towels designed for automotive use. Quality microfiber towels for PPF installation ensure no scratches are added during prep and help achieve a flawless final look.
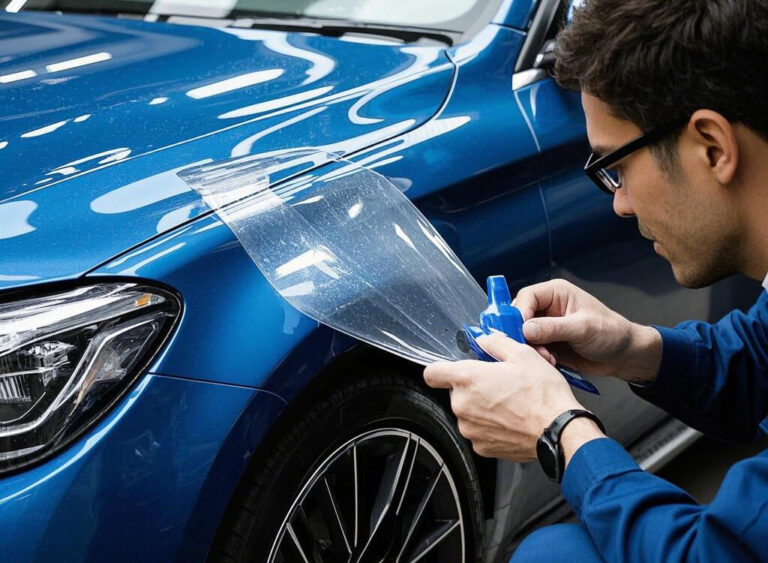
5. Squeegee for PPF Film Installation
The squeegee is one of the most important tools in your arsenal. It helps press the film into place while pushing out air bubbles and excess solution. Use a squeegee for PPF installation with interchangeable tips (soft, firm, felt-lined) depending on the surface curves and angles.
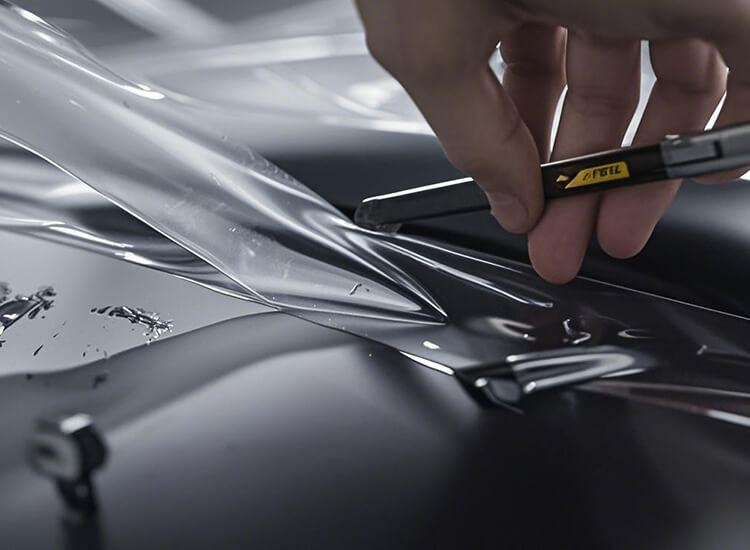
6. Knife for PPF Film Cutting
You’ll need a sharp, precision knife for PPF film cutting to trim away excess film without damaging the paint. Most pros use breakaway blade knives with stainless steel blades. Make sure you’re using a blade that allows for PPF film cutting techniques with high accuracy around badges, trims, and door handles.
7. Masking Tape for PPF Edge Protection
Masking tape for PPF edge protection is used to protect vulnerable trim or panel gaps while installing the film. It prevents polish, debris, or film edges from getting stuck in sensitive areas. Always choose automotive-grade tape that leaves no adhesive residue.
8. Heat Gun for PPF Installation
A quality heat gun for PPF installation is essential to make the film more pliable around curves and tight angles. It also activates the film’s self-healing properties and smooths out wrinkles. Use a digital heat gun with temperature control to avoid overheating and damaging the film.

How to Install Paint Protection Film Like a Pro Step-by-Step
Step 1: PPF Surface Preparation Guide
Start with a thorough wash using car shampoo and clean microfiber towels. Dry the car completely, then use a clay bar to remove bonded contaminants. Next, apply masking tape around sensitive trim areas and panel edges to protect them. You’re now ready to start applying the film.
Step 2: Apply Slip Solution and Position the Film
Spray the slip solution for PPF installation evenly using a spray bottle. Carefully lay the film onto the wet surface and move it around until it’s perfectly aligned. PPF application tips for beginners: Always start with small, flat sections first. Master these before moving to curved panels.
Step 3: Use Squeegee and Microfiber Towels
Once positioned, use a squeegee for PPF film installation to press the film onto the surface. Work from the center outwards in overlapping strokes. Use a clean microfiber towel to remove any excess moisture and check for trapped air bubbles.
Step 4: Trim the Film
Use a knife for PPF film cutting to trim any extra material. Keep the blade sharp and steady. Never use excessive pressure that could damage the paint underneath. This is where your skill and attention to detail make all the difference.
Step 5: Apply Heat and Final Check
Use a heat gun for PPF installation to conform the film around curves, bumpers, and side mirrors. Heat also activates the film’s self-healing feature. Inspect the entire surface for bubbles or alignment issues. Re-squeegee if needed and wipe everything down one last time.
Wet vs Dry PPF Installation: Which Method to Choose?
- Wet method: Involves using slip solution; allows repositioning and is ideal for large or curved areas.
- Dry method: Film is applied directly without solution; faster but less forgiving, best for small, flat panels.
Most pros recommend the wet method for tricky spots, as it provides better control.
PPF Application Tips for Beginners
- Always work in a dust-free environment
- Never reuse microfiber towels from previous steps
- Invest in professional PPF installer kit instead of generic tools
- Use quality film from trusted manufacturers
- Practice on scrap panels if you’re a first-timer
Why Use Professional PPF Installation Services?
If you’re hesitant about DIY installation, it’s smart to go with a professional PPF installation service. Experts already have the best tools needed for automotive PPF installation and experience handling complex vehicle shapes. In India, for example, The Detailing Mafia PPF installation team is known for top-tier work using the latest techniques and tools.
Final Words: Build Your Authority with the Right Tools
Whether you’re a professional detailer or an ambitious car owner, mastering how to install paint protection film starts with having the right PPF installation tools and techniques.
With this guide, you now understand:
- The role of each tool in the PPF installer kit
- The importance of PPF surface preparation
- When to use wet vs dry PPF installation methods
By applying these insights and keywords in your content strategy, you’ll be well on your way to establishing yourself as a true authority in the Paint Protection Film (PPF) space. Stay tuned for more expert-level guides on car detailing tools for PPF, manufacturer reviews, and cutting-edge PPF application tips for beginners and pros alike.
| ELVO Offers Fast Paint Protection Film OEM Services |
| 25 Days |
| From Ideas To Mass Production |
| Start OEM For Your Brand Now! |
| Whatsapp: +85251657739 or Email: info@elovppf.com |